How to migrate your Windows installation and data from a Hard Drive to Solid State Drive (SSD) without reinstalling
A SSD (Solid State Drive) is one of the best bang-for-buck upgrades you can perform on an older computer, typically decreasing the boot time by well over half. It can truly bring a 3-6 year old PC back from the garbage pile to something very usable.
If you’re tasked with swapping a Hard Drive out for an SSD, it can seem daunting at first, but it’s far easier than you could imagine:
Determining which type of SSD you require
Computer SSD’s typically come in two form-factors: 2.5″ SATA, and m.2
The first step before committing to an upgrade would be to open the desktop or laptop computer to determine:
a) is the drive is physically accessible? This can be very fiddly with some laptops and all-in-one desktops- a quick search of the model on YouTube or searching for the workshop manual on Google will almost always give you the answer
b) which form-factor do you require? Most likely, the answer will be a 2.5″ SATA drive. However, you may find an unpopulated m.2 slot on the motherboard, allowing you to add an SSD alongside your existing drive.
Equipment needed
At the time of writing, these are the most popular 2.5″ SATA and m.2 SSD’s on Amazon
2.5″ SATA SSD’s:
m.2 SSD’s:
If you’re installing a 2.5″ SSD, you’ll also require a USB adapter to allow you to clone the data over from the old drive to the new:
Step 1 – Downloading the Cloning software
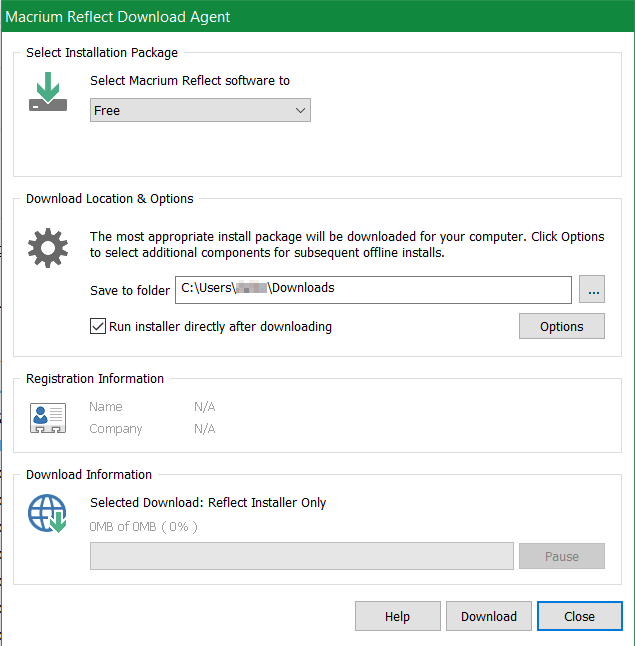
The go-to software for this has been Macrium Reflect Free Edition, and for good reason – it’s free for both home and commercial use, and it’s very reliable! (When downloading, there is no need to enter an email or register)
The installer is a little strange – it will download a downloader, which is used to download the application! It makes no sense to us, but it works and it simple enough to use; just press on the Download button at the bottom of the screen:
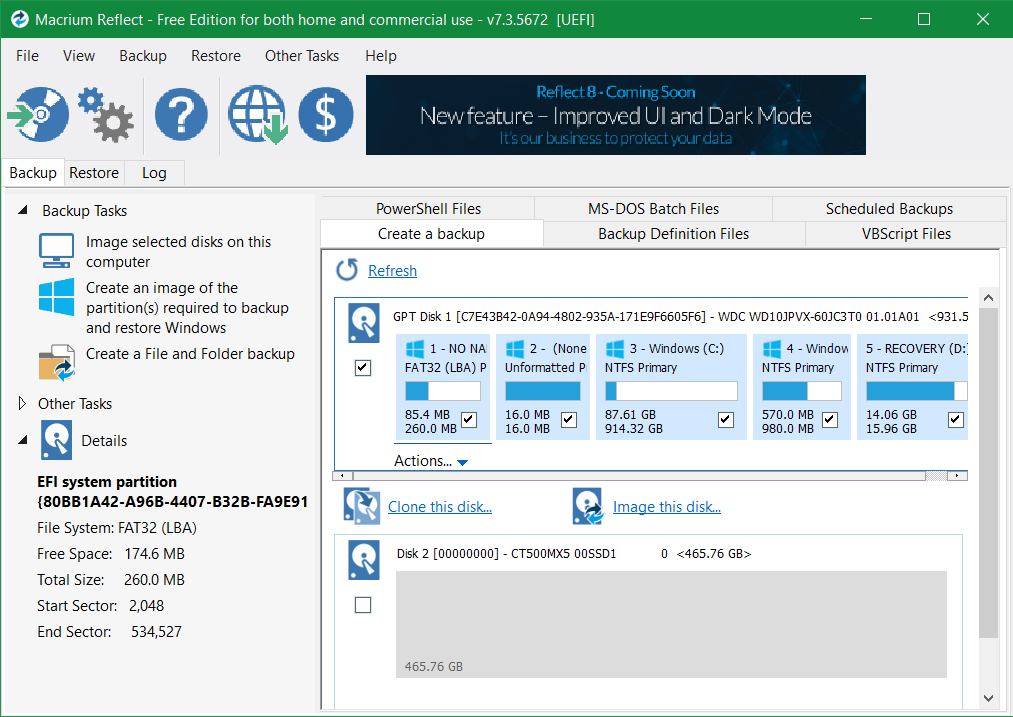
Once you’ve followed the prompts and the software has installed, you’ll see a screen showing you the currently connected disks
Step 2 – preparing the clone
If you haven’t already done so, now is the time to connect your new SSD via the USB adapter.
As long as both of your disks are showing, click on ‘Clone this disk…’ and select your destination disk (i.e. your new SSD)
If your new drive is smaller than your source, you will need to manually click-and-drag the partitions from the top to the bottom drive, leaving the largest partition to last. This final partition will automatically resize to fit the remaining space on the disk.
Before clicking ‘Next’, it’s worth double-checking that you have the same number of partitions on both the source and destination disks. You don’t want any data left behind!
Next, you’re prompted to ‘Schedule this clone’ – ignore this and click ‘Next’ again.
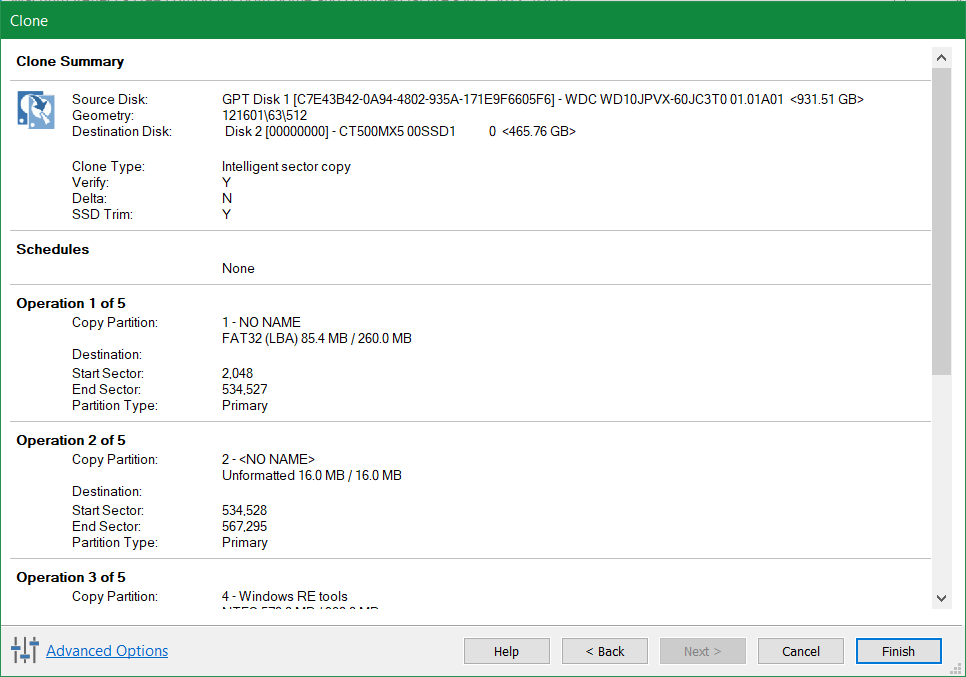
The Summary screen is your final chance to check everything is set up correctly before the clone begins. Double-check your source and destination disks are set correctly. Once you’re happy, click ‘Finish’:
Click OK to proceed, and the cloning process begins!
Step 3 – sit back and wait!
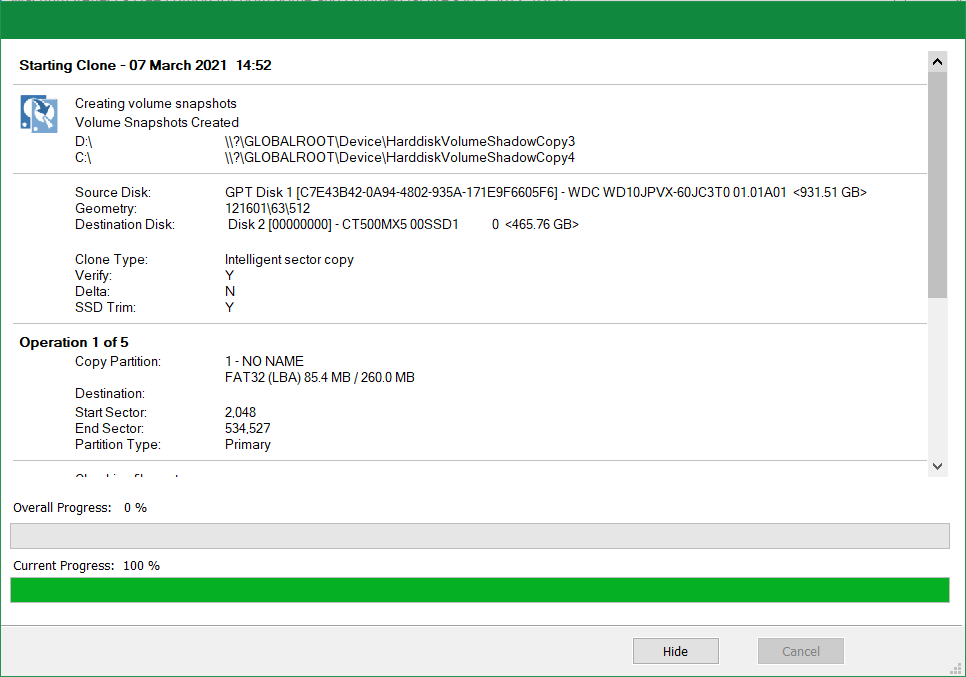
At this point, the cloning magic begins to happen! It’s worth observing the first few minutes and making sure no errors are presented. Once the overall progress reaches 2-3%, it’s a safe bet that everything is running smoothly and can be left unattended.
How long this process takes depend on where your bottleneck is (most likely the read speed of the source disk), and how much data needs migrating. In this instance, it took just under 2 hours to copy 100 GB.
After some time, you’ll be presented with a ‘Success’ message, at which point you can shut down your computer

Step 4 – installing the new SSD in the computer
At this point, these instructions are going to be less specific as this process varies depending on your computer:
Desktop PC users are likely going to find this easiest as the components are easily accessible. Pop the side off the tower, grab a screwdriver and swap over the old hard drive with your new SSD. Hard Drives and SSD’s typically connect using the same SATA connector.
Laptops and All-in-one desktop PCs can be more fiddly:
- often they will have an obviously removable bottom/rear panel which allows easy access to the Hard Drive and RAM. If not;
- try a Google search for the workshop manual for your particular model. If that isn’t available;
- try a search on YouTube for your model + “HDD replacement”
Step 5 – power on and witness the speed!
Power on your PC and you should immediately notice how much quicker and more responsive it is.
In this instance, the PC went from 6 minutes boot time to just over 1 minute; much better!
Finishing touches
Open a command prompt window and paste in the following command:
fsutil behavior query DisableDeleteNotifyThis should give you the same output as below:
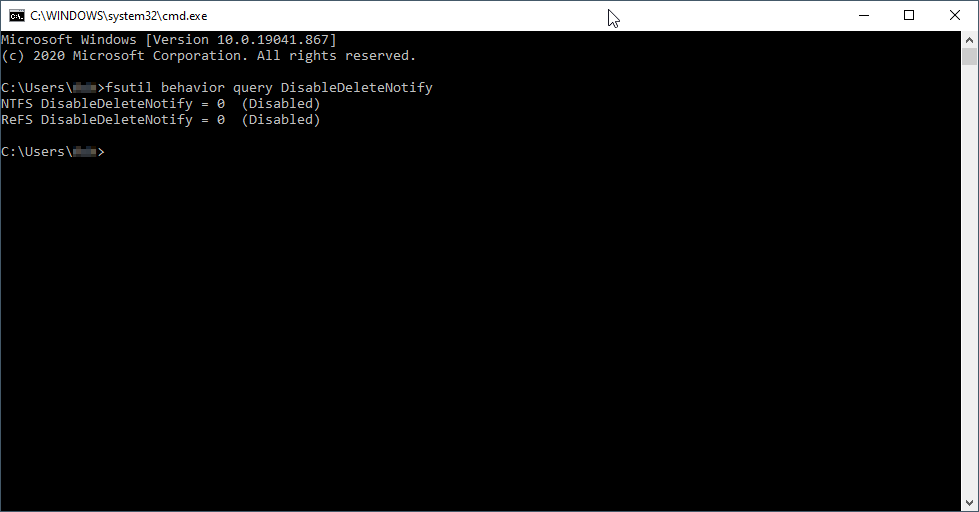
If the result is not 0, enter the following command to force the change:
fsutil behavior set DisableDeleteNotify 0And you’re all done! Enjoy the speed!
![Apple Configurator 2: “The operation couldn’t be completed. (AMRestoreErrorDomain error 4 – failed to handle message type StatusMsg) [AMRestoreErrorDomain – 0x4 (4)]”](https://goddamnpc.com/wp-content/uploads/2020/10/iPadOS-cannot-be-restored-1-275x206.jpg)